开发(基于ruoyiui)笔记

开发(基于ruoyiui)笔记
LiSir问题(一)在查询时参数没有带入
1 | *<el-form-item label="项目赛道" prop="proTrack">* |
这是一段vue代码,我出现的问题是再前端页面查询的时候无法带入proTrack这个参数。
解决方法:因为我们proTrackList中没有value这个字段,导致我再绑定的时候:value=”item.value”绑定出错,将value更换为proTrack成功在查询时候带入了参数proTrack
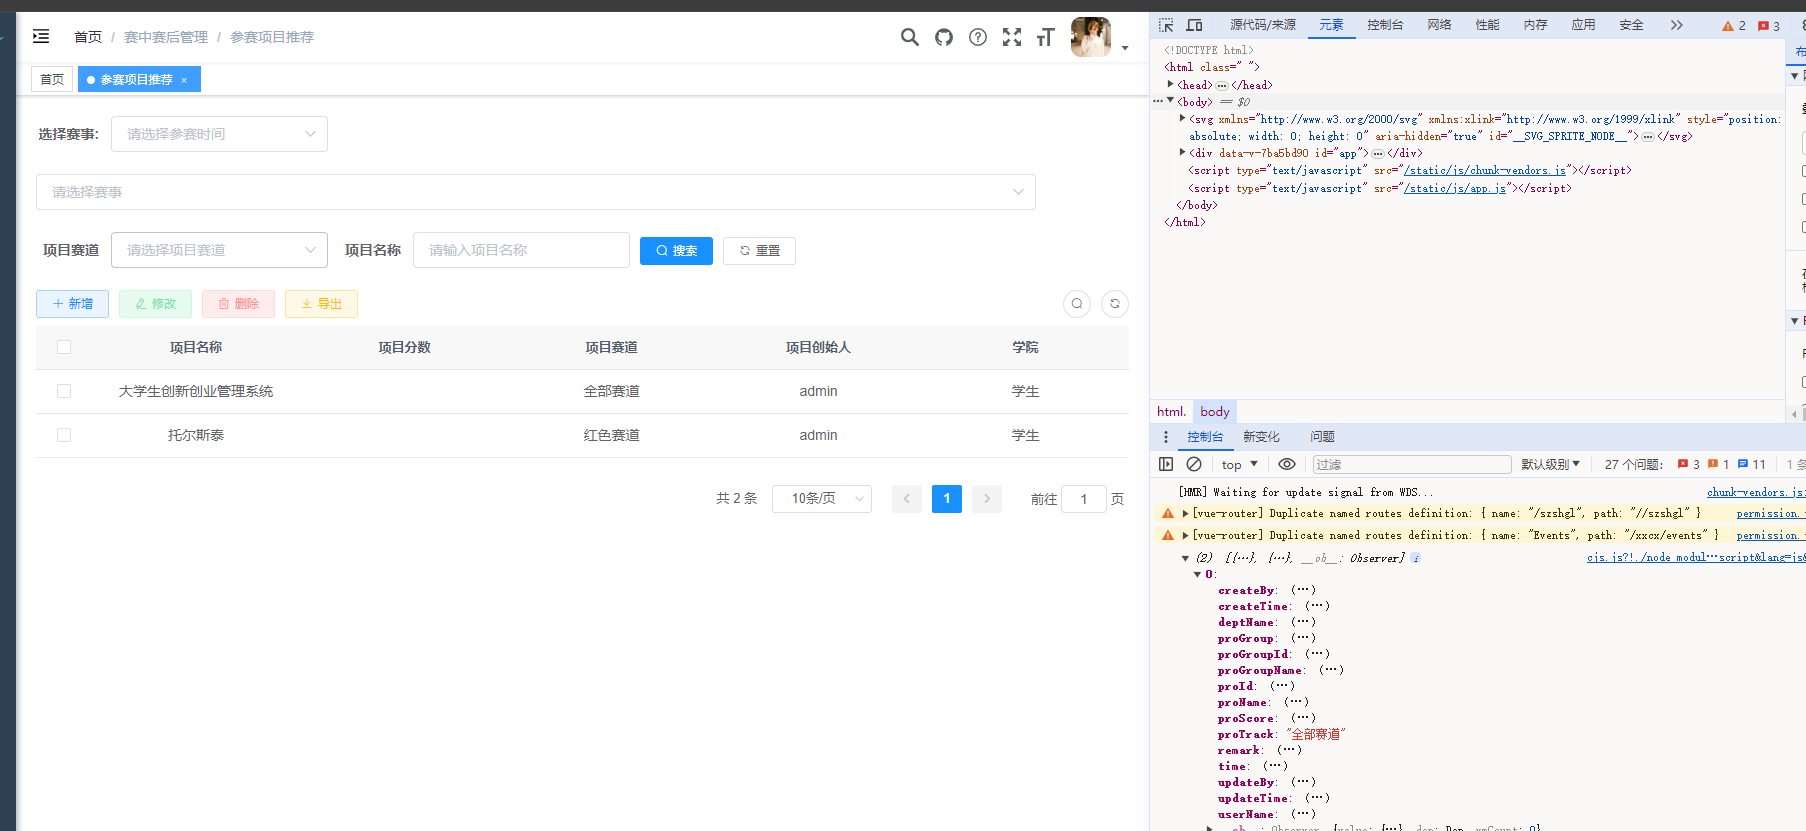
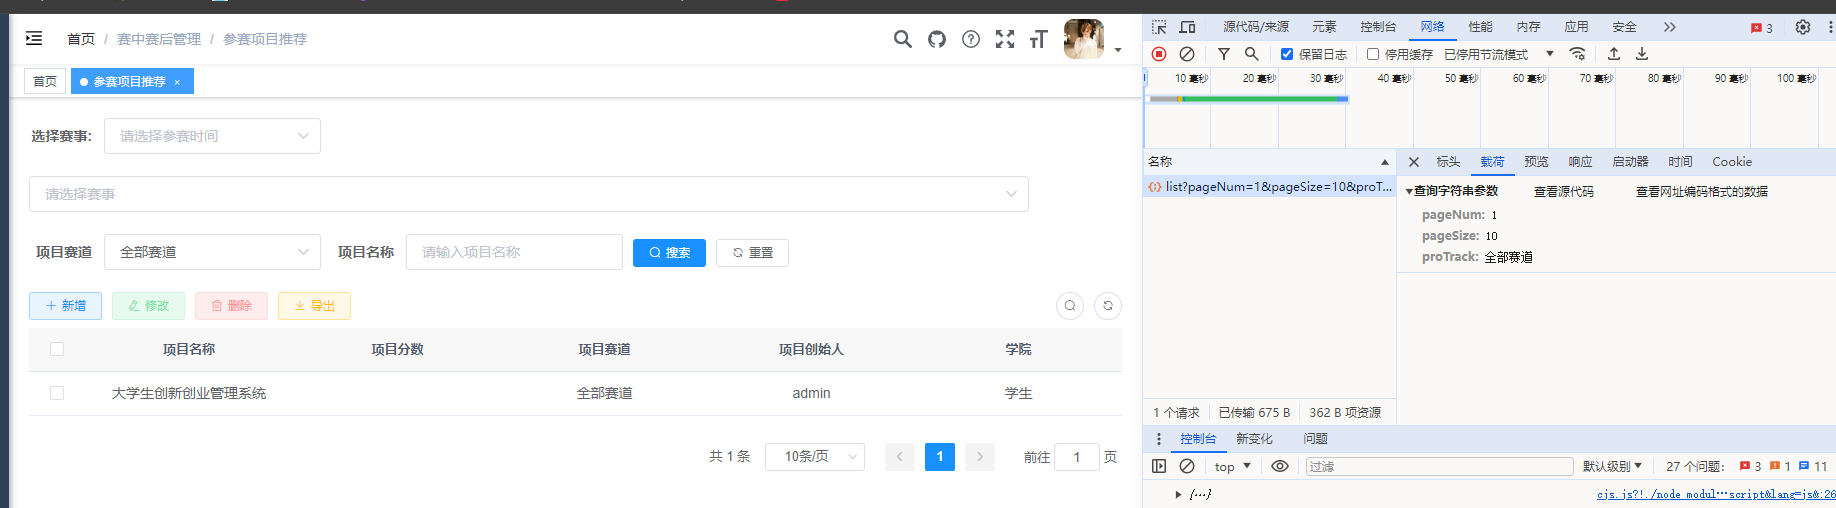
还有一种没有带入参数的情况就是,有些需要参数的函数,你可能没有传入函数或者定义接受函数的变量。那这时候我们就需要去定义这个函数对于变量的传与接。下面来举一个我的错误例子
先来看我原本的写法
1 | //查询小组列表 |
可以看selectOnChangeTrack这个函数里,我在调用 this.selectGroup(this.Track);时,我传入了参数this.Track,this.Track是选择框的数据,proTrack是查询参数。而我在上面的函数时,却没有接收传过来的参数this.Track ,在vue中,通常定义一个形参,在作为传来参数的载体,然后再将这个形参的值赋值给查询变量,这样就能完成参数的传递,改动如下
1 | //查询小组列表 |
以上即是改正后的。改正后可以带入要传的参数了。
问题(二)数据库字段名称与后端java应该对应
这是一段ruoyi对应的后端代码
1 | <select id="selectRecommendationList" parameterType="Recommendation" resultMap="RecommendationResult"> |
mybaits中数据查询mapper文件中,值得注意的是在and后的字段名称**(比如uesr_name,dept_name,pro_track,pro_group等等)**要和数据库中的字段对应而前面的proGroup是实体类中我们自己定义的属性。
不对应,就会报错
以下这段代码是同样的道理,请注意数据字段是column后面的而实体类是property后面的,数据库字段要和自己的数据库中的字段一致(完全一致)
1 | <resultMap type="Recommendation" id="RecommendationResult"> |
问题(三)对vue中v-for的理解
在Vue的v-for循环中,:key、:label和:value是用于绑定循环中每个元素的属性的特殊语法。
:key用于指定循环中每个元素的唯一标识符。它是必需的,用于帮助Vue跟踪每个元素的身份,以便在更新DOM时进行高效的重用和重新排序。通常,你可以使用一个唯一的属性或索引作为key,确保在循环中的元素之间具有唯一性。:label用于指定循环中每个选项的显示文本。它绑定了每个选项的显示值,这将在选择框中显示给用户。- :value`用于指定循环中每个选项的实际值。它绑定了每个选项的实际值,当用户选择某个选项时,该值将被传递给绑定的数据模型。
这些特殊语法(:key、:label和:value)是Vue中用于在循环中绑定属性的常见约定,但你也可以根据需要选择其他属性名称。重要的是确保在循环中的每个元素都有唯一的标识符作为key,以及适当的属性用于label和value。这样可以确保循环中的每个元素都能正确地显示和处理。
问题(四)理解一段代码的含义(以获取学院名称列表为例)
1 | /**获取学院名称函数 */ |
下面对这段代码剖析:
1 | getDeptNameList() { this.loading = true; *// 设置 loading 状态为 true,表示正在加载数据* |
帮助理解
思路(一)选择框一限定选择框二的内容
如果想实现两个选择框第一个选择框里面的所选择的内容可以改变第二个选择框里面的数据(比如选择了第一个框里面的2021年,那第二个选择框就会显示在2021里面有什么内容)
可以考虑使用@change=””来绑定一个变化,只要第一个选择框里面的内容变了,那么就会执行@change绑定的事件比如
1 | //选择框一 |
1 | //选择框二 |
1 | //@change的所绑定事件的功能 |
问题(五):在今天编写代码时候遇到了这么一个问题,就是关于添加数据前端页面他不给我显示。
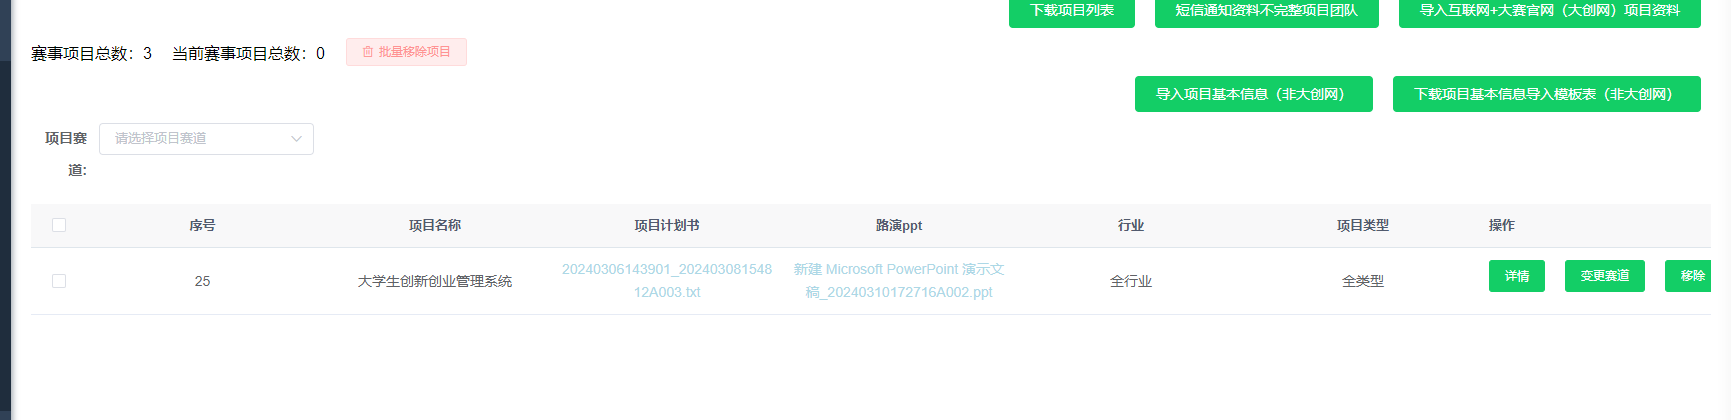
查看发现是getfilename函数作怪,因为我的这个函数是要获取路径去分割,然而我并没有在数据库给出路径,所以这两个数据显示不出来,更改函数后成功显示,函数更改如下
1 | getfileName(path){ |
方法1:在数据库中呢,我删除一个数据,由于这个数据关联很多表,那就需要一同删除,这可以利用触发器,以下是我在该项目中写道的触发器
1 | BEGIN |
该触发器是当我们根据项目id(pro_id)删除数据时,他会带着通过项目id关联的id里面的内容一同删除,删除的表名称、是pro_coreteam
4.2新添加了一个触发器代码如下
1 | DELIMITER // |
解释
在这个触发器中,当在 pro_mapping_group 表中插入新的记录时,将会更新 pro_details3 表中对应 pro_id 的 pro_group_id 字段。这里假设 pro_mapping_group 表和 pro_details3 表通过 pro_id 字段关联。如果你的实际情况不同,请根据实际情况修改 WHERE 子句。
请注意,这个触发器只在插入新的记录时触发,如果你更新 pro_mapping_group 表中的 group_id 字段,这个触发器不会触发。如果你希望在更新 group_id 时也触发,你需要创建一个额外的 AFTER UPDATE 触发器
方法2:如何写一个对话框即点击按钮弹出对话框?
1 | <template> |
方法3:如何在插入数据时携带其他参数
新建你要插入的属性比如我下面的
1 |
|
在服务层写好定义的方法
1 | public int insertCore(ProCoreteam proCoreteam); |
实现类中实现方法
1 |
|
在mapper中定义方法
1 | public int insertCore(ProCoreteam proCoreteam); |
在xml文件中使用方法
1 | <insert id="insertCore" parameterType="ProCoreteam" > |
同理按照以上步骤创建stuNumber的方法
1 | <select id="selectstuIdBystuNumber" parameterType="long" resultMap="ProManagerResult"> |
关键点在下面,我们要先获取插入完成以后的proid
1 | -- |
- 1.最外层的
<insert></insert>没有返回属性(resultType),但是里面的<selectKey></selectKey>是有返回值类型的。 - 2.
order="AFTER"表示先执行插入,之后才执行selectkey语句的。 - 3.
select @@identity和select LAST_INSERT_ID()都表示选出刚刚插入的最后一条数据的id。 - 4.实体类中id属性字段一定需要set以及get方法
- 5.此时,接口中仍不需要有返回值,框架会自动将值注入到我们
insert的那个对象中,我们可以直接使用就可以了。
其实,我们的接口中可以有返回值,但是这个返回值不是id,而是表示插入后影响的行数,此时sql中仍和上面一样,不需要写返回值。
1 | <insert id="insertStudentCacheId" parameterType="Student"> |
最最最核心的一步
1 | //执行完以后主键自增,获取到自增的proId所以要先执行 |
问题(六)基于ruoyiUI新建对话框的一些属性问题
我们首先新建一个对话框,代码如下(我这个时ruoyiUI的对话框建法)
1 | <el-dialog :title="title" :visible.sync="open" width="1500px" append-to-body> </el-dialog> |
:title="title":此属性设置对话框的标题。title应该是你的 Vue 实例的 data 属性之一,用来存放对话框的标题。:前缀表示这是一个动态属性,它的值会被解析为 JavaScript 表达式。:visible.sync="open":此属性控制对话框的可见性。如果open是true,对话框就会显示;如果open是false,对话框就会隐藏。.sync修饰符表示这个属性是双向绑定的:当对话框的可见性改变时,open的值也会相应地改变(对话框自带的×)。width="1500px":此属性设置对话框的宽度。在这个例子中,对话框的宽度被设置为 1500 像素。append-to-body:此属性表示对话框将被附加到body元素。这可以防止对话框被其他 CSS 影响,确保它能正确地显示在其他元素之上。这是一个布尔属性,如果存在,其值就是true。
方法4: 如何获取当前行id?
面对这个问题我只想说,这可真是让我想的酣畅淋漓的一次啊,为什么这么说?先来看看我犯了什么错误把
首先,我当时一心只想着获取当前行id,但是却忽视了原表格是一个静态表格这个前提。所以我花了快一个小时,唉还好脑子转得快(快什么,要是快的话早想到了)突然意识到了,这是一个静态表格,我去哪里动态获取当前行?
其次,因为脑子当时很热,一点思路也没有,所以就乱撞,白白荒废了时间。
接下来,让我来整理获取当前行id的一个思路
首先想,你要在哪一行操作,好的定位到这一行,要用<template></template>标签,具体写法如下:
1 | <el-table-column prop="selectPro" label="查看项目" width="208"> |
比如我就是这一行要注意了,绑定点击事件的时候,必须加scope.row.xxxx其中的xxxx是你要获取的什么什么id,那么这样你就可以获取到当前行的id了
1 | getAllocationList(groupId){ |
可以在你所用的时间console.log(groupId)你获取的id然后查看控制台有没有对应的id输出,然后传递参数就可以了。
你甚至还可以这么写
1 | getAllocationList(groupId){ |
也是可以的,ok今天就写这么多0.0
问题7:在传入参数时的错误
报错是这样对的
Error: nested exception is org.apache.ibatis.binding.BindingException: Parameter 'groupId' not found. Available parameters are [arg1, arg0, param1, param2] 翻译一下就是
错误:嵌套异常是 org.apache.ibatis.binding.BindingException:找不到参数“groupId”。可用参数为 [arg1, arg0, param1, param2]
这是我传入参数的函数
1 | getAllocationList(row){ |
这是js里面对应的接口
1 | export function alreadyAllocation(groupId,proTrack){ |
报错问题是gruopId找不到,可用参数给出了[arg1, arg0, param1, param2] 这四个参数,这时我就在想,那是不是传入的参数得用这四个中的几个呢?于是我检查了后端,在处理器(proAllocationController)中打印了我从前端带过来的两个参数
1 | /** |
控制台输出
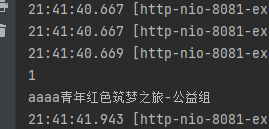
可以看到控制台是有groupId的输出1这就是说拿到了前端数据那为什么后端确说我没有定义呢?检查xml文件
1 | <select id="selectGroupProjectByGroupId" parameterType="GroupProject" resultMap="GroupProjectresultMap"> |
于是就想到会不会是参数的传递问题呢?于是我就尝试用arg0代替groupId,用age1代替了proTrack,下面是更新完xml文件
1 | <select id="selectGroupProjectByGroupId" parameterType="GroupProject" resultMap="GroupProjectresultMap"> |
运行代码,成功传递了数据,问题解决了。你要是问我为什么这样做,其实我也不清楚,但是通过报错信息给出了可用的四个参数,所以说有错误还是要从报错信息入手啊
问题8:vue+ruoyi前端内网在线预览ppt
在内网在线预览ppt时,我踩了很多坑,这里记录一下我都翻过什么错误。
错误一:在给数据模型里面的数据赋值时,没有搞清楚层级,来看代码
 这里,我定义了一个
prevForm对象,里面有prev和url两个数据。然而在我进行赋值操作时错写成了this.prev = xxxx,this.url=xxxx,看似没错,但是实际上已经少写了一层了那就是丢了一个最大的对象prevForm正确写法是这样的错误二:
没有搞清楚=,==,===这三个符号的意思,=:意味着赋值操作,左边的值赋值给右边的,==是比较运算符,当左右两边相等时返回true,不相等时返回false,而===在前端中表示全等,意味着完全相等,意思就是在做运算判断时,等式两边的数值以及数据类型都必须相同。在线预览ppt:
- 我完成这次任务主要使用了vue-office,官网:vue-office: 支持word(.docx)、excel(.xlsx)、pdf等各类型office文件预览的vue组件集合,提供一站式office文件预览方案,支持vue2和3 (gitee.com)
思路是,我在a标签中写了一个函数whatType用来判断这是一个以什么结尾的文件,这里用到了方法pop()取最后一个元素
来说一下在线预览ppt的模板:
第一步,确定你要在线预览文件的类型:
1
2
3
4
5
6
7
8//docx文档预览组件
npm install @vue-office/docx vue-demi
//excel文档预览组件
npm install @vue-office/excel vue-demi
//pdf文档预览组件
npm install @vue-office/pdf vue-demivue模板
1
2
3
4
5
6
7
8
9
10
11
12
13
14
15
16
17
18
19
20
21
22
23
24
25
26
27
28
29
30
31
32
33
34<template>
<vue-office-docx :src="docx" @rendered="rendered"/>
<vue-office-excel :src="excel" @rendered="rendered"/>
<vue-office-pdf :src="pdf" @rendered="rendered"/>
</template>
<script>
//引入VueOfficeDocx组件
import VueOfficeDocx from '@vue-office/docx'
//引入VueOfficeExcel组件
import VueOfficeExcel from '@vue-office/excel'
//引入VueOfficePdf组件
import VueOfficePdf from '@vue-office/pdf'
//引入相关样式
import '@vue-office/docx/lib/index.css'
export default {
components:{
VueOfficeDocx
},
data(){
return {
docx: 'http://static.shanhuxueyuan.com/test6.docx' //设置文档网络地址,可以是相对地址
excel:
pdf:
}
},
methods:{
rendered(){
console.log("渲染完成")
}
}
}
</script>
 这里,我定义了一个
 没有搞清楚=,==,===这三个符号的意思,=:意味着赋值操作,左边的值赋值给右边的,==是比较运算符,当左右两边相等时返回true,不相等时返回false,而===在前端中表示全等,意味着完全相等,意思就是在做运算判断时,等式两边的数值以及数据类型都必须相同。
一次性引入了三个,这样会渲染三个
最后,展示一下我写的点击弹出弹窗,来展示对应的内容,代码如下(只展示核心部分,多余代码省略):
1
2
3
4
5
6
7
8
9
10
11
12
13
14
15
16
17
18
19
20
21
22
23
24
25
26
27
28
29
30
31
32
33
34
35
36
37
38
39
40
41
42
43
44
45
46
47
48
49
50
51
52
53
54
55
56
57
58
59
60
61
62
63
64
65
66
67
68
69
70
71
72
73
74
75
76
77
78<template>
.........
<el-table-column label="项目计划书" align="center" prop="proPlan" >
<template slot-scope="scope">
<a @click="whatType(scope.row.proPlan)" v-if="getfileName(scope.row.proPt) !== '暂无资料'">
{{ getfileName(scope.row.proPlan) }}
</a>
<a v-else>
{{ getfileName(scope.row.proPlan) }}
</a>
</template>
.......
<!--弹出各种文件预览弹窗-->
<el-dialog :visible.sync="dialogPrevVisible" title="文件预览" width="90%" >
<el-form style="margin-top: 10px;" :model="prevForm">
<template v-if="prevForm.prev == 'docx'">
<vue-office-docx style="height: 90%" :src="prevForm.url" @rendered="rendered"/>
</template>
<template v-if="prevForm.prev == 'xlsx'">
<vue-office-excel style="height: 90%" :src="prevForm.url" @rendered="rendered" />
</template>
<template v-if="prevForm.prev == 'pdf'">
<vue-office-pdf style="height: 90%" :src="prevForm.url" @rendered="rendered"/>
</template>
</el-form>
</el-dialog>
......
</template>
<script>
//引入VueOfficeDocx组件
import VueOfficeDocx from '@vue-office/docx';
import VueOfficeExcel from '@vue-office/excel';
import VueOfficePdf from '@vue-office/pdf';
//引入相关样式
import '@vue-office/docx/lib/index.css';
data() {
return {
//设置弹窗初始状态
dialogPrevVisible:false,
prevForm:{
prev:'',
url:''
},
.....
}
methods: {
//判断路径的类型
whatType(path){
//获取文件拓展名并改为小写
var tempPath = path;
console.log(tempPath);
//pop函数取最后一个元素,然后在转成小写。
var fileType = path.split('.').pop().toLowerCase();
console.log(fileType);
if(fileType == 'docx'){
this.prevForm.prev = 'docx',
this.prevForm.url='http://192.168.1.104/dev-api'+ tempPath
this.dialogPrevVisible = true;
}else if(fileType == 'excel'){
this.prevForm.prev = 'excel',
this.prevForm.url='http://192.168.1.104/dev-api'+ tempPath
this.dialogPrevVisible = true;
}else if(fileType =='pdf'){
this.prevForm.prev = 'pdf',
this.prevForm.url='http://192.168.1.104/dev-api'+ tempPath
this.dialogPrevVisible = true;
}else{
window.alert("不支持查看该文件格式")
}
},
rendered(){
console.log("渲染完成")
},
}
</script>
Vue中v-model数据绑定问题(绑定对象)
在vue中,选择框中如果需要传递多个值到后端进行带参数的查询,这时,我们就应该将这两个值,绑定在一个对象上,那么关于如何绑定到对象以及进行参数的传递,下面是我的理解:
示例代码:
<el-form :model="queryParams"> <el-form-item label="请选择赛事:" prop="proGameId"> <el-select v-model="this.selectedOption" placeholder="请选择下拉选择" clearable :style="{width: '100%'}" @change="getList2"> <el-option v-for="(item, index) in EventList" :key="index" :label="`${item.proGame}——${item.groupName}`" :value="{ proGameId: item.proGameId, groupId: item.groupId }" :disabled="item.disabled"></el-option> </el-select> </el-form-item> </el-form>1
2
3
4
5
6
7
8
9
10
11
12
13
14
15
16
17
18
19
20
21
22
23
24
25
26
27
28
29
30
31
32
33
34
35
36
37
38
39
40
41
42
43
44
45
46
47
48
49
50
51
52
53
54
55
56
57
解释:**:label="`${item.proGame}——${item.groupName}`"**绑定成这样的label,在我们的选择框中就会是下面的样式

**:value="{ proGameId: item.proGameId, groupId: item.groupId }"**通过这样的绑定,想要将proGameId和groupId同时绑定到该选择框中,那么首先v-model的绑定应该是一个对象
并且在对象中,还必须包含你所绑定的这两个属性值,初始化为null。(初始化为空的原因是对象初始化就是空对象),如下图

这样,就完成了数据在选择框层面的绑定。那么如何传递这两个数据呢?比如我今天就遇到这样的问题,从后端查询到这两个的值,同时也需要把查询到的值 ,再绑定到选择框中,当选择框的内的选项一改变就会传递这两个对象的值到后端再进行一次查询。
首先要做的就是绑定@change事件,比如我上面代码中的

然后

这样就成功把值带到查询参数里面,就可以在次传递给后端进行查询啦。
最后,如果在调用函数getList2的时候我并没有指定参数,那么在方法中的getList2(value)中,这个value就指的是:value所绑定的内容。也就是用户选择的值
# 文件的上传
## 二进制blob传输
Blob(Binary Large Object)是一种用于存储大量二进制数据的数据类型。在数据库中,BLOB 通常用来存储图像、文档、视频等文件。而在Web开发中,Blob对象表示一个不可变的、原始数据的类文件对象。Blob 表示的数据不一定是一个JavaScript原生格式。Blob 对象可以表示一个文本文件或一个图片文件等。
### Blob的基本概念
- **Blob对象**:Blob对象表示一个不可变的、原始数据的类文件对象。Blob表示的数据不一定是一个JavaScript原生格式。Blob对象可以表示一个文本文件或一个图片文件等。
- **File对象**:File对象是Blob对象的一个子类,主要用于表示用户从设备中选择的文件。每个File对象都有一个name属性(文件名)和一个lastModified属性(文件最后修改的时间戳)。
- 一个file对象通常利用事件对象获取
- **FileReader对象**:FileReader接口提供了一个API,允许Web应用程序异步读取存储在用户计算机上的文件(或原始数据缓冲区)的内容,使用FileReader对象可以读取Blob或File对象中的数据。
- 值得注意的是,该对象中包含了下面的内容
、
包括读取完毕的result和一些回调,所以读取是异步任务
### 创建Blob对象
可以通过多种方式创建Blob对象,以下是一些常见的方法:
- **从字符串创建**:
```javascript
const text = "Hello, world!";
const blob = new Blob([text], {type: "text/plain"});
从ArrayBuffer创建:
1
2const buffer = new ArrayBuffer(8);
const blob = new Blob([buffer], {type: "application/octet-stream"});从文件输入创建:
1
<input type="file" id="fileInput">
1
2
3
4document.getElementById('fileInput').addEventListener('change', function(e) {
const file = e.target.files[0];
// file 就是一个Blob对象
});
使用Blob对象
转换为URL:可以用于前端页面的img标签的url来直接显示图片
1
2
3
4
5const blobUrl = URL.createObjectURL(blob);
// 使用blobUrl作为img元素的src属性
const img = document.createElement('img');
img.src = blobUrl;
document.body.appendChild(img);发送到服务器:利用FormData类来向服务器发送。
1
2
3
4
5
6
7
8
9
10const formData = new FormData();
formData.append('file', blob, 'filename.txt');
//fetch返回了一个Promise对象。
fetch('/upload', {
method: 'POST',
body: formData
})
.then(response => response.json())
.then(data => console.log(data))
.catch(error => console.error(error));读取Blob内容:利用FileReader来异步读取对象。注意是等待读取完之后再输出内容。
1
2
3
4
5
6
7const reader = new FileReader();
reader.onload = function(e) {
// const content = reader.result //这样写也可以
const content = e.target.result; // Blob的内容
console.log(content);
};
reader.readAsText(blob); // 或者使用readAsDataURL, readAsBinaryString, readAsArrayBuffer 这里读取完成后会触发onload事件,随之输出内容**fr.readAsText(blobFiles)**:以文本方式读取
**fr.readAsBinaryString(blobFiles)**:以二进制字符串方式读取
**fr.readAsDataURL(blobFiles)**:以base64方式读取文件
}
注意事项
- 内存管理:使用完Blob URL后,应该调用
URL.revokeObjectURL(blobUrl)来释放与该URL关联的内存。 - 类型安全:当创建Blob时指定正确的MIME类型,有助于确保数据以正确的方式被处理。
- 浏览器兼容性:虽然大多数现代浏览器都支持Blob,但在使用时仍需检查目标浏览器的支持情况。
文件的下载
使用a标签的download属性
这是最简单直接的方法,适用于浏览器支持 download 属性的情况。通过设置 <a> 标签的 href 属性为文件的 URL,并添加 download 属性来指定下载的文件名。
1 | <a href="path/to/your/file.pdf" download="newFileName.pdf">点击下载</a> |
使用第三方库来进行下载
如果您希望在Web应用中通过第三方库实现文件下载功能,这里有几个常用的JavaScript库可以帮助您简化这一过程。这些库通常提供了更丰富的功能,如进度条显示、断点续传等。下面是一些流行的库及其基本用法:
1. axios
axios 是一个基于Promise的HTTP客户端,可用于浏览器和node.js。它支持跨域请求,并且可以方便地发送GET/POST请求。
安装:
1 | npm install axios |
使用示例:
1 | import axios from 'axios'; |
2. file-saver
file-saver 是一个用于浏览器的库,可以非常方便地保存文件到用户的计算机上。
安装:
1 | npm install file-saver |
使用示例:
1 | import { saveAs } from 'file-saver'; |
3. js-file-download
这是一个轻量级的库,专门用于将Blob对象转换为文件并触发下载。
安装:
1 | npm install js-file-download |
使用示例:
1 | import download from 'js-file-download'; |
注意事项
- CORS 配置:确保您的服务器已经正确配置了CORS,允许来自您的前端应用的请求。参考我之前提供的关于如何配置CORS的信息。
- 安全性:在生产环境中,确保下载链接的安全性,避免暴露敏感数据。
- 文件大小限制:对于大文件下载,考虑使用流式传输或分块下载以提高性能和用户体验。
以上就是使用第三方库在Web应用中实现文件下载的一些方法。选择合适的库可以根据您的具体需求来决定。
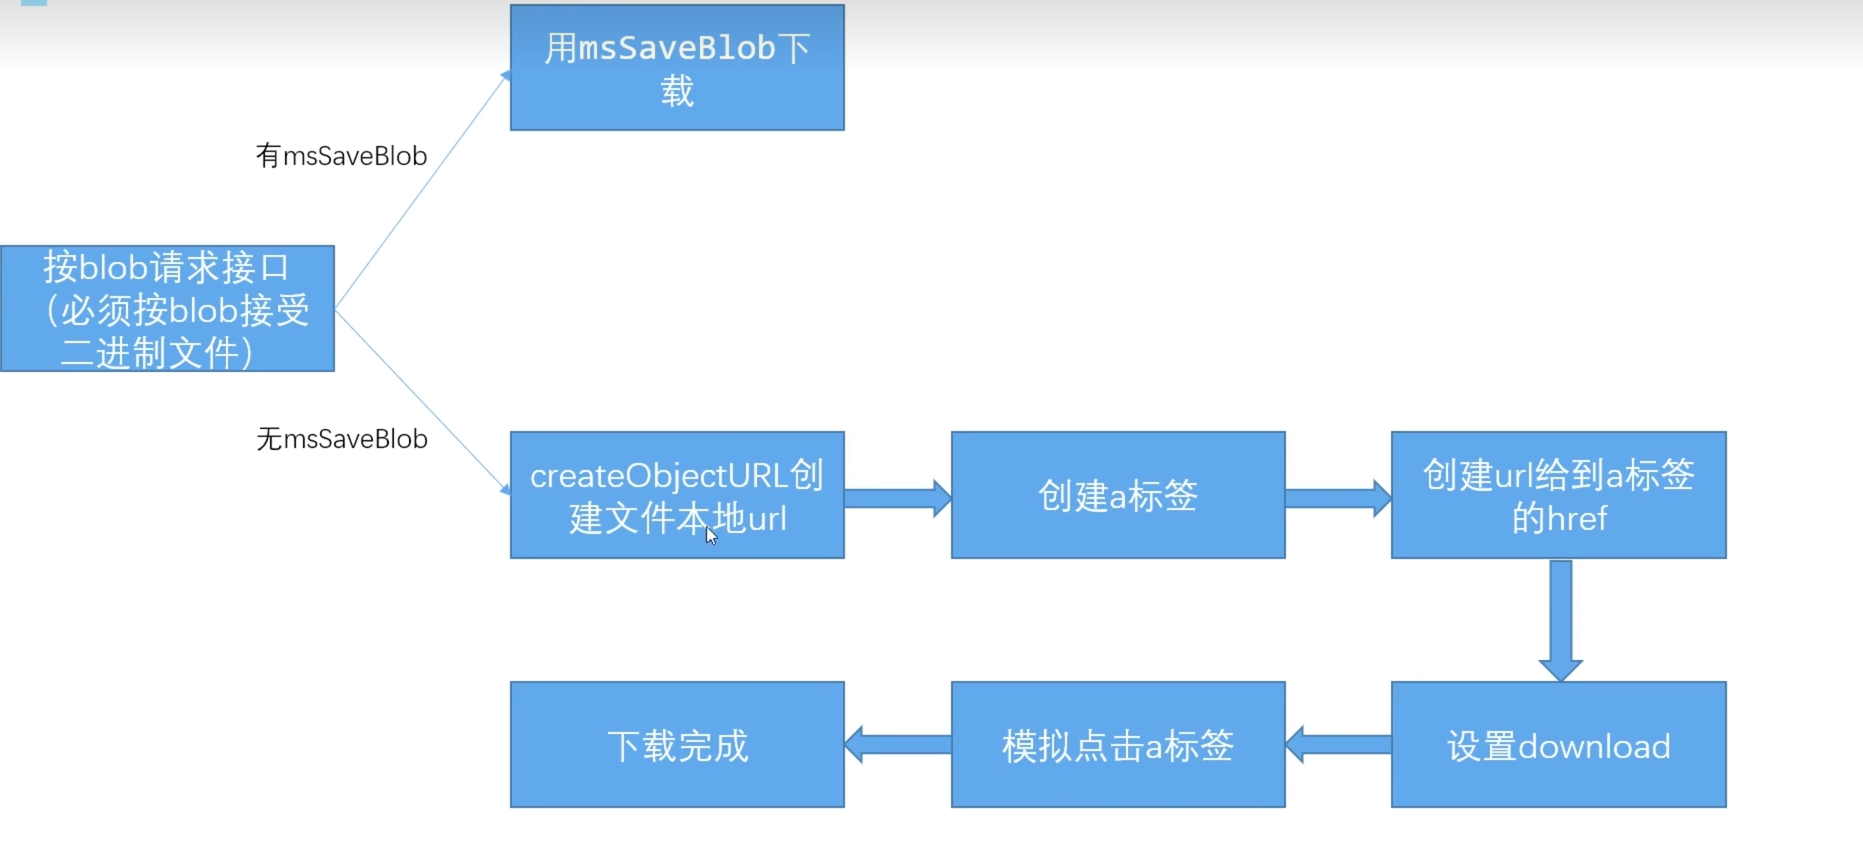
基本过程
代码中的数学
动态渲染代码文本中的数学表达式
这里我推荐使用MathJax3.x版本。
使用前须知:渲染可以选择异步和同步渲染,具体看需求,但切记,渲染是在数据加载完毕之后进行的,如果过早的引入或使用会导致数据还未被渲染就呈现在页面上了。
1.随便目录下新建(我这里使用的是vue-ruoyi框架),在utils下新建MathJax.js文件
1 | // 设置 MathJax 配置 |
2.vue中可以先引入,因为我这里需要的是异步渲染所以我直接在mouted钩子中进行加载
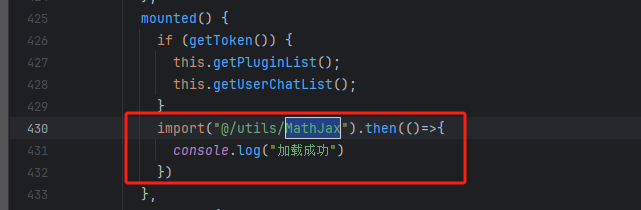
控制台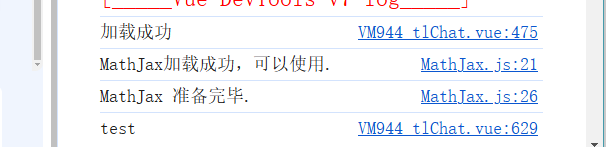
然后通过vue的钩子$nextTick在需要等待dom加载完毕的地方调用即可。
MathJax3.x 中的api
MathJax.typeset()同步方法
MathJax.typesetPromise()异步方法
可以选择封装一个渲染函数来动态的使用
1 | //渲染数学公式 |
好了,可以完整的在页面上显示数学公式了。如果你还想更加仔细的配置MathJax请参考官方文档。